SEO
Gmail Account for SEO Outreach: Setup Guide
Set up a Gmail account for SEO outreach on your computer: the address choice that gets read, phone verification, recovery, security, warm-up and sending limits.

TL;DR: A Gmail account for SEO is a five-minute signup and three decisions. Signup: google.com, Gmail, “Create an account,” name, address, password, phone. The decisions: pick an address you’d be happy pasting into a pitch, keep it entirely separate from your personal Gmail, warm it up before you send at volume.
A Gmail account for SEO isn’t a personal inbox with a different name on it. It’s a working account with one job.
I’ve run three of them for years, one personal, one for outreach, one that owns Google Search Console and Analytics access, and keeping them apart isn’t tidiness: it means a burned outreach address never costs me my Search Console history, and a client handover is one account transfer instead of an archaeology project. I learned that split the expensive way, by having a single account do all three jobs at once.
What You Need Before You Start
Before you go to Google, have these ready:
- A computer with a browser open
- A mobile phone number you have access to (Google will send a verification code)
- A secondary email address if you have one (optional, for account recovery)
- A strong password in mind (at least 12 characters, mix of letters, numbers, symbols)
That’s it. No payment details, no existing Google account required.
Step 1: Go to Google and Click Gmail
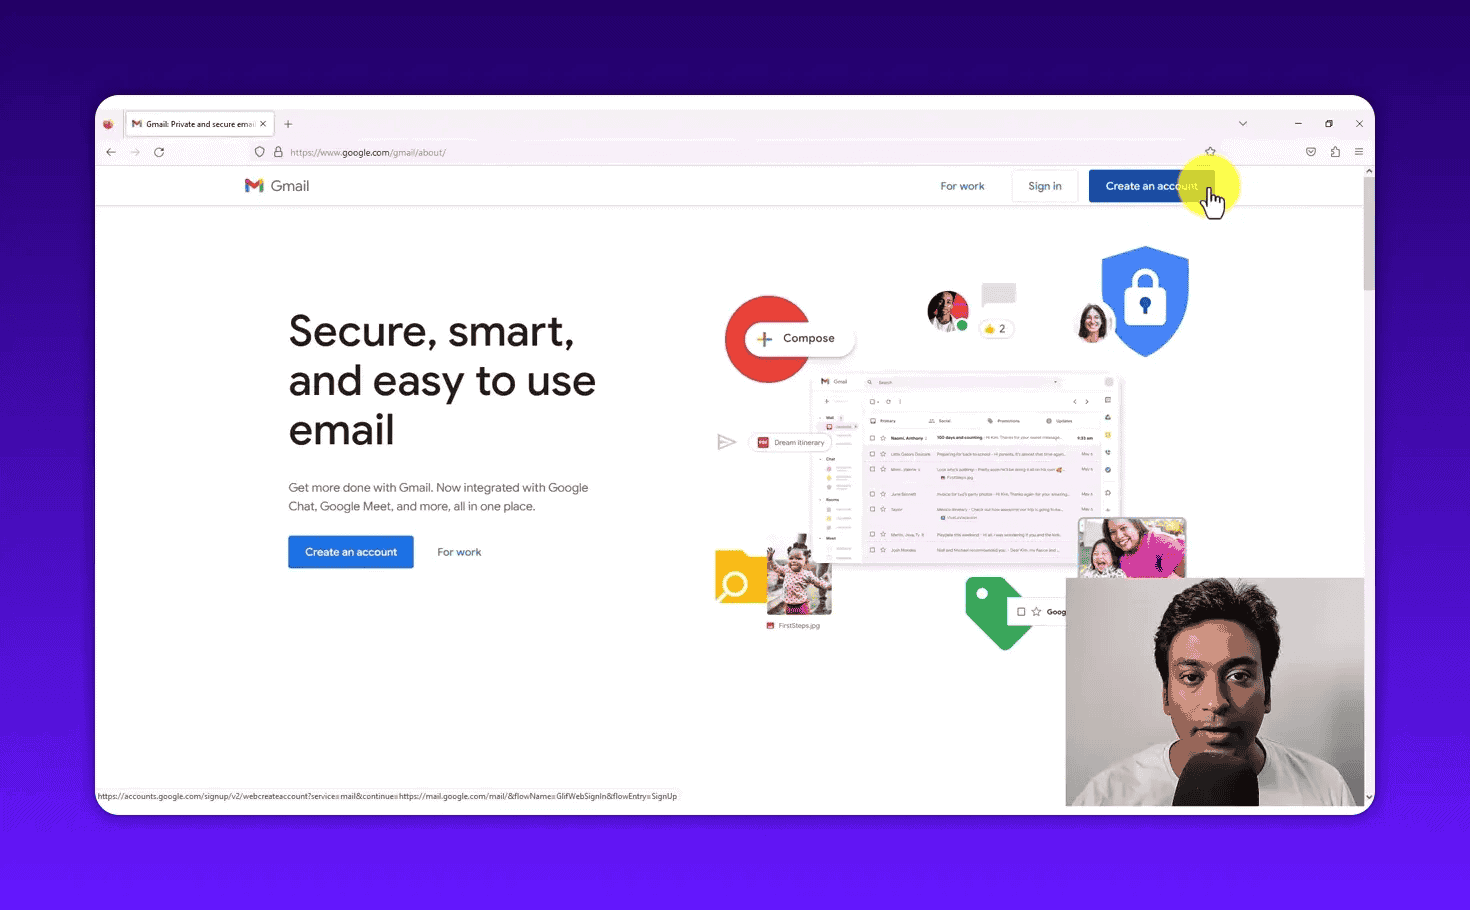
Open your browser and go to google.com. In the top right corner of the Google homepage, you’ll see a link that says Gmail. Click that.
This takes you to the Gmail homepage. If you aren’t signed in to any Google account, you’ll see a sign-in screen with a “Create account” link below the main button.
Click “Create account.”
Google will ask you one question: are you creating this account for personal use, or for work and business? Choose based on your situation. For most purposes, personal is fine.
Step 2: Enter Your Name
The first screen asks for your first name and last name. This name is what other people see when they receive emails from you.
A few things worth knowing here:
- You can use any name you want, including a business name or a pseudonym
- You can change this name later inside your Gmail settings without creating a new account
- If this is a dedicated outreach or business account, use your full professional name or your brand name
Enter the name you want associated with this Gmail address and click Next.
Step 3: Set Your Date of Birth and Gender
Google asks for your date of birth and gender. This information is used to comply with age-related privacy laws and to customize certain features. It isn’t publicly visible to people emailing you.
Select your birth date from the dropdowns and choose your gender preference. Click Next.
Step 4: Choose Your Gmail Address (Gets Read Before Your Pitch Does)
This is the most important step in the whole process.
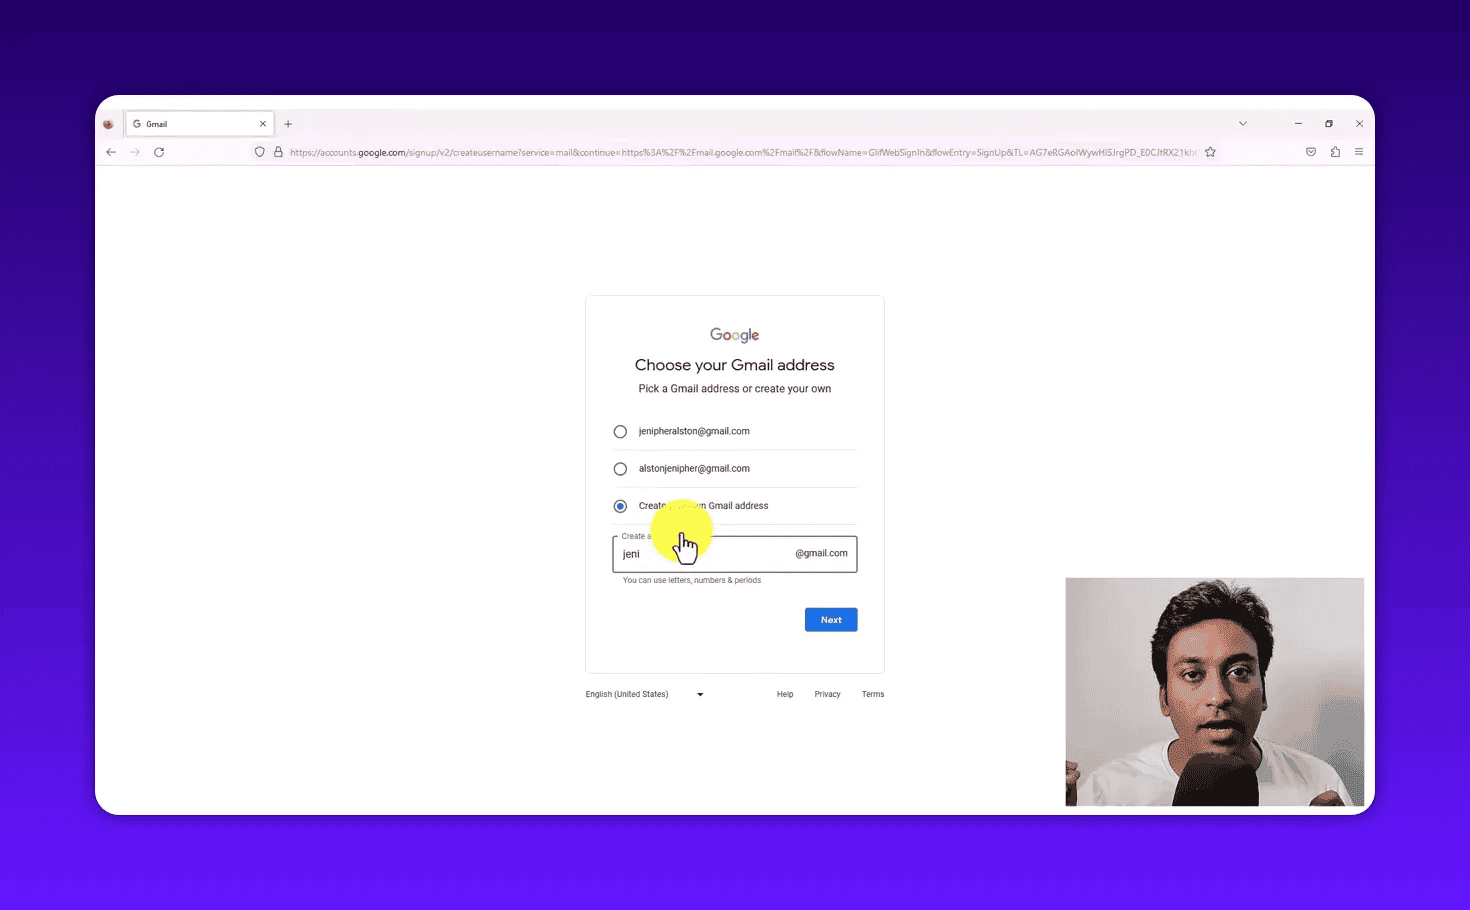
Your Gmail address is the part before @gmail.com. It’s permanent once set, and no two Gmail accounts can share the same address. If [email protected] already exists, it’s taken forever.
Google will show you two or three suggested addresses based on your name. In most cases, simple first-name and last-name combinations like [email protected] are already taken. Google generates suggestions with numbers or abbreviations to help, for example [email protected].
If you don’t like the suggestions, click “Create your own Gmail address” and type what you want. Gmail allows letters, numbers, and periods in the address. No spaces, no special characters other than a period.
Tips for choosing a Gmail address:
- For personal use, your name plus a memorable number works fine
- For SEO outreach or business use, choose something professional: [email protected] or [email protected]
- Avoid addresses that look like spam bots: random strings of characters damage deliverability before you send a single email
- Keep it short enough to type without errors when giving it verbally
If the address you want is available, you can proceed. If not, Google will tell you immediately and you’ll need to try a different variation.
Step 5: Create a Strong Password
Once your address is confirmed as available, create your password.
Google requires a minimum of eight characters, but don’t stop there. Use at least 12 characters. Include uppercase letters, lowercase letters, numbers, and at least one symbol. A password like this: MyOutreach@2026! is far stronger than password123.
Type your password in the first box. Type the exact same password in the confirmation box below it. If they don’t match, Google will flag it and ask you to re-enter.
Click Next.
Step 6: Phone Number Verification
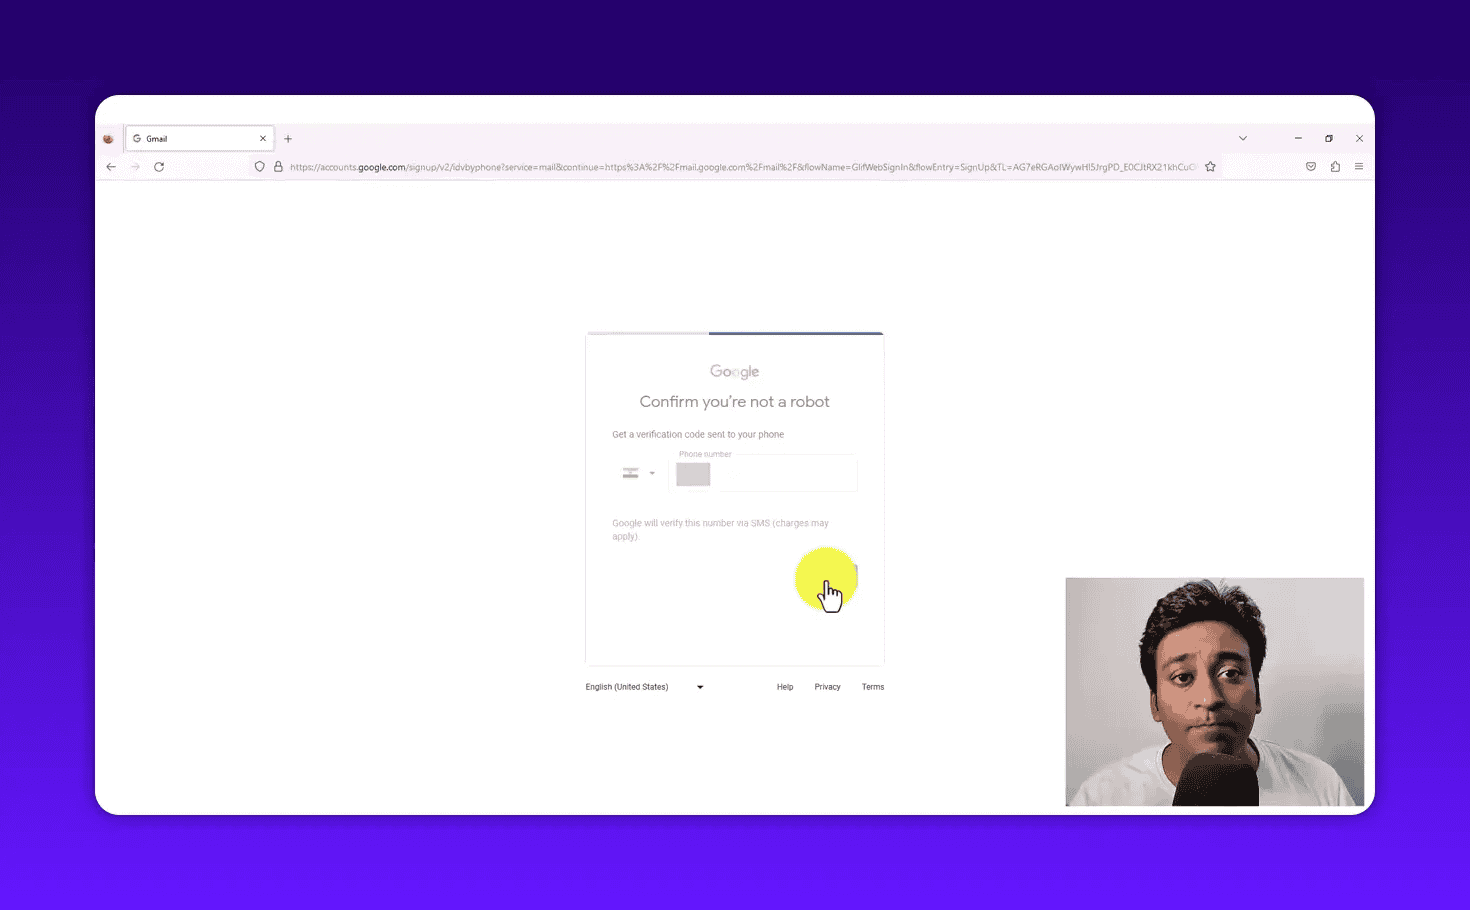
Google will now ask for a mobile phone number. This step is mandatory for most new accounts. It isn’t optional.
Why does Google require this?
People create Gmail accounts in bulk for spam campaigns and fake profile networks. Phone verification is Google’s method of confirming you’re a real person with a real device, not an automated script creating thousands of accounts.
Google states clearly on this screen that your number will only be used for verification. They won’t use it to send you marketing messages at this stage (though they may ask later if you want to link it for other services).
How to enter your number:
- Click the flag icon to select your country code if it isn’t already set to your country
- Type your mobile number without the country code prefix
- Click Next
Google sends a six-digit OTP (one-time password) via SMS to that number within a few seconds. Enter the six digits in the verification screen. If you didn’t receive the message, click the link to request a new code.
Step 7: Add a Recovery Email (Recommended)
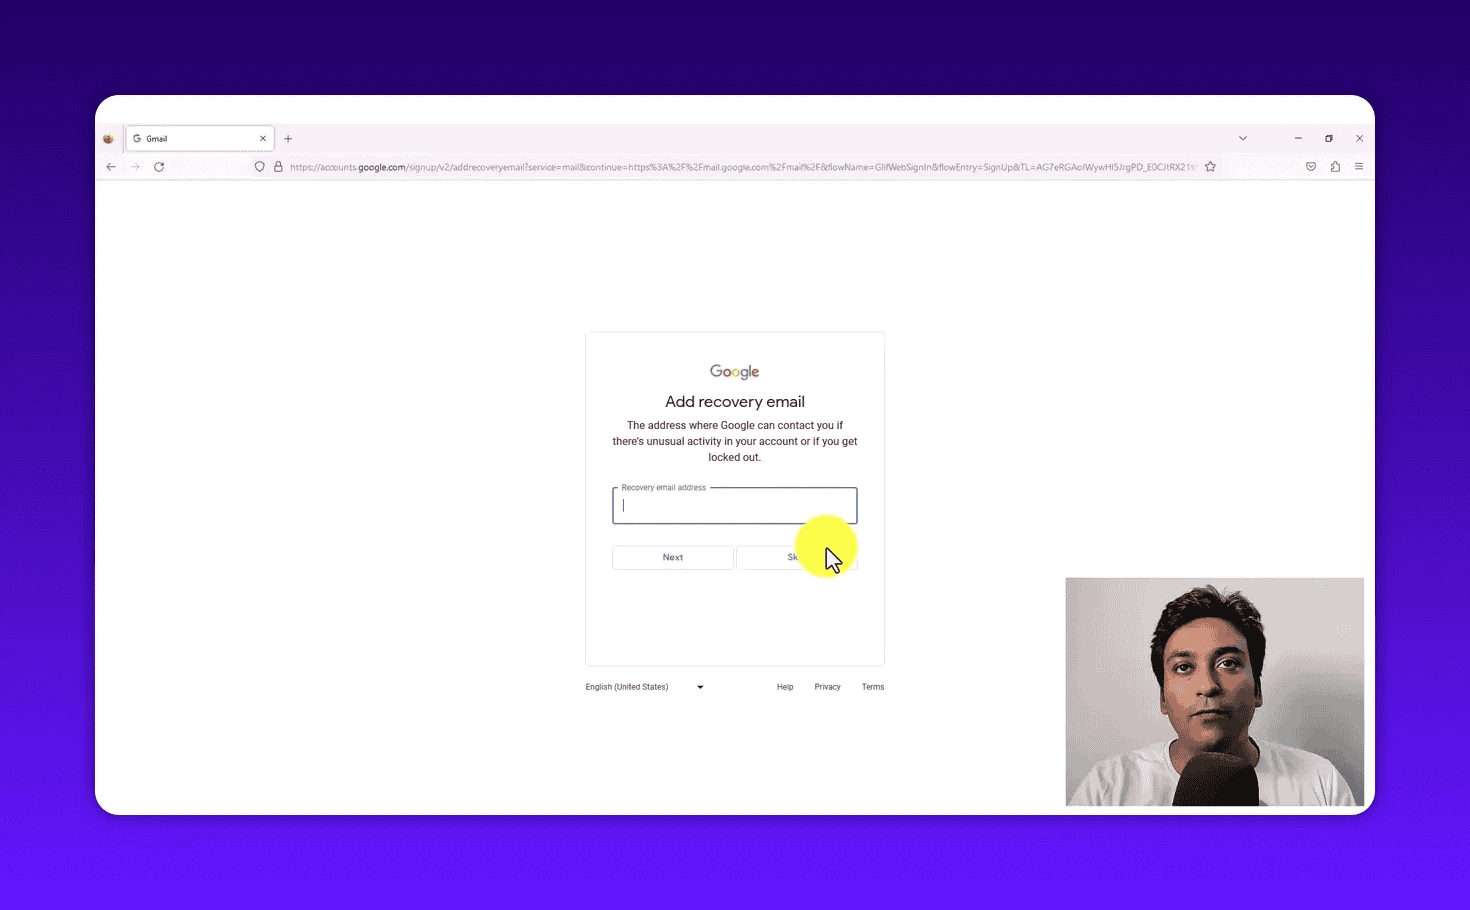
After phone verification, Google offers you the option to add a recovery email address.
This is a different email account (not the one you’re creating) that Google uses to reach you if something goes wrong: forgotten password, suspicious login detected, or account locked.
Should you add one?
If you have any other email account, including an old one you rarely use, add it here. Recovery email is genuinely useful. I’ve seen people lose access to Google accounts permanently because they skipped recovery options and then forgot their password six months later with no way back in.
If you don’t have another email address right now, click Skip. You can add a recovery email later through account settings.
If you do have one, type it in and click Next.
Step 8: Decide Whether to Add Your Phone Number to the Account
This step confuses a lot of people because you just verified your identity with a phone number. Why is Google asking about a phone number again?
Here’s the difference:
- Step 6: Google used your number only to verify you’re human. That number isn’t permanently linked to your account.
- Step 8: Google is asking if you want to save that number as part of your account profile for ongoing security purposes.
Google says this number will be used only for account security and won’t be visible to others. Adding it means if you ever lose access to your account, they can send a recovery code to your phone.
You can click Yes, I’m in to link the number or click Skip to leave your account without a linked phone number.
For accounts used in SEO outreach or business work, linking the phone number is smart. It gives you an extra recovery option.
Step 9: Review Account Information
Google shows you a summary screen of everything you entered: your name, the Gmail address you chose, and any recovery options you added.
Review the details. If anything looks wrong, use the Back button to go and fix it. Once you proceed, the account is created and the email address is permanently yours.
Click Next.
Step 10: Privacy and Terms
The final screen before your account is live is Google’s privacy and terms agreement.
Google displays several data settings here:
- Web and App Activity: Whether Google saves your browsing and search history when signed in to personalize your experience
- Ad personalization: Whether ads shown to you’re tailored based on your activity
- YouTube history: Similar browsing and watch history settings for YouTube
You aren’t required to turn on any of these to create the account. Click More options to review each setting individually, or scroll down and click I agree to proceed with Google’s defaults.
There’s no right or wrong answer here. It’s a personal preference about data sharing. For a dedicated work or outreach account, I turn off as much tracking as possible, mainly because I don’t want business browsing history mixing with personalized suggestions.
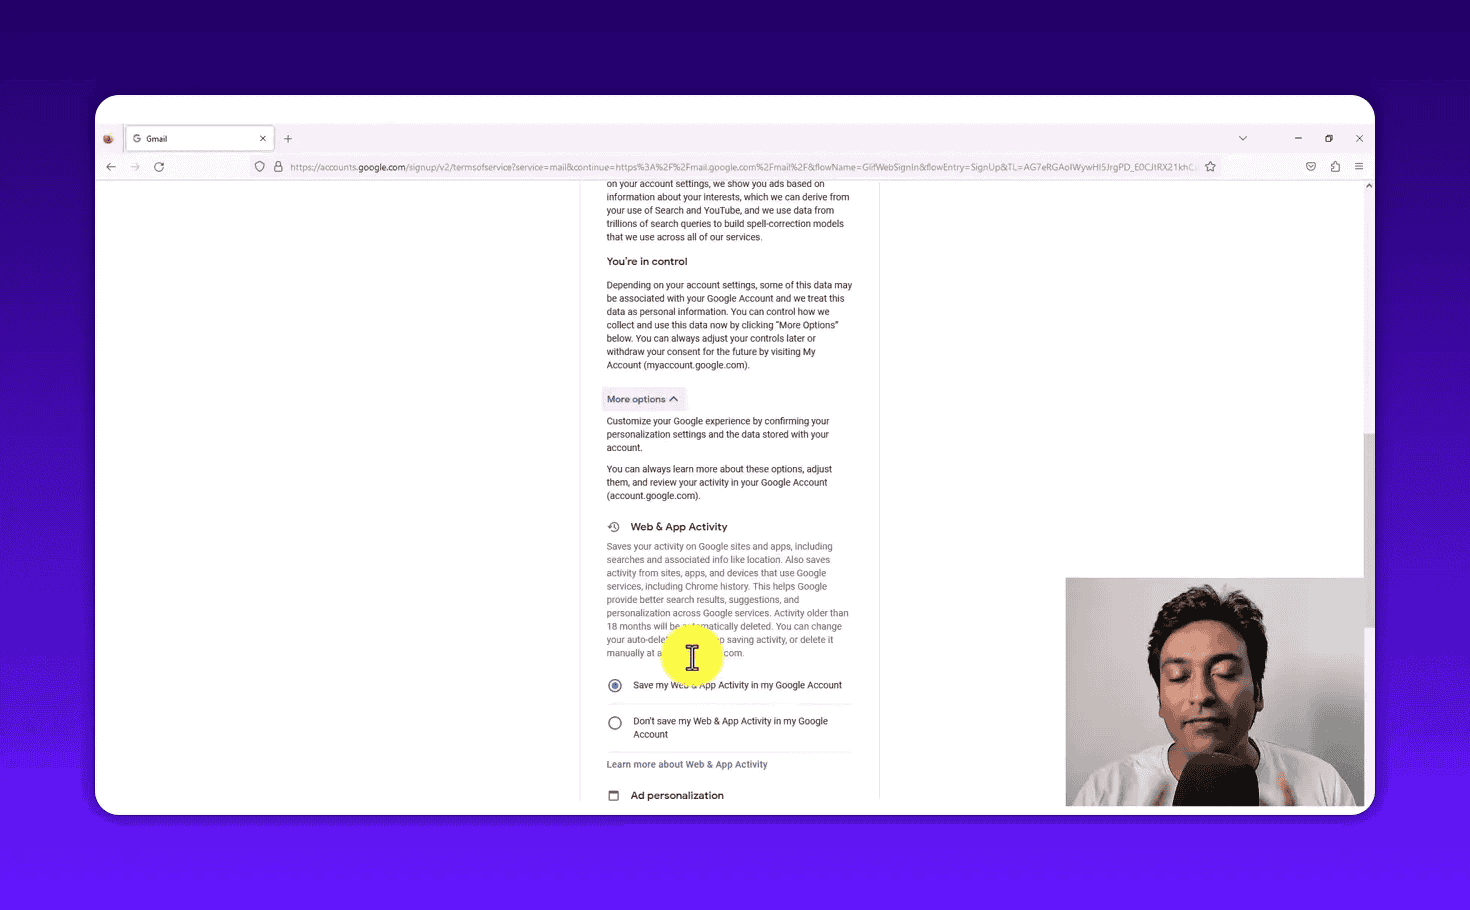
Click I agree when you’re ready.
Your Gmail account is now created.
What Your New Gmail Inbox Looks Like
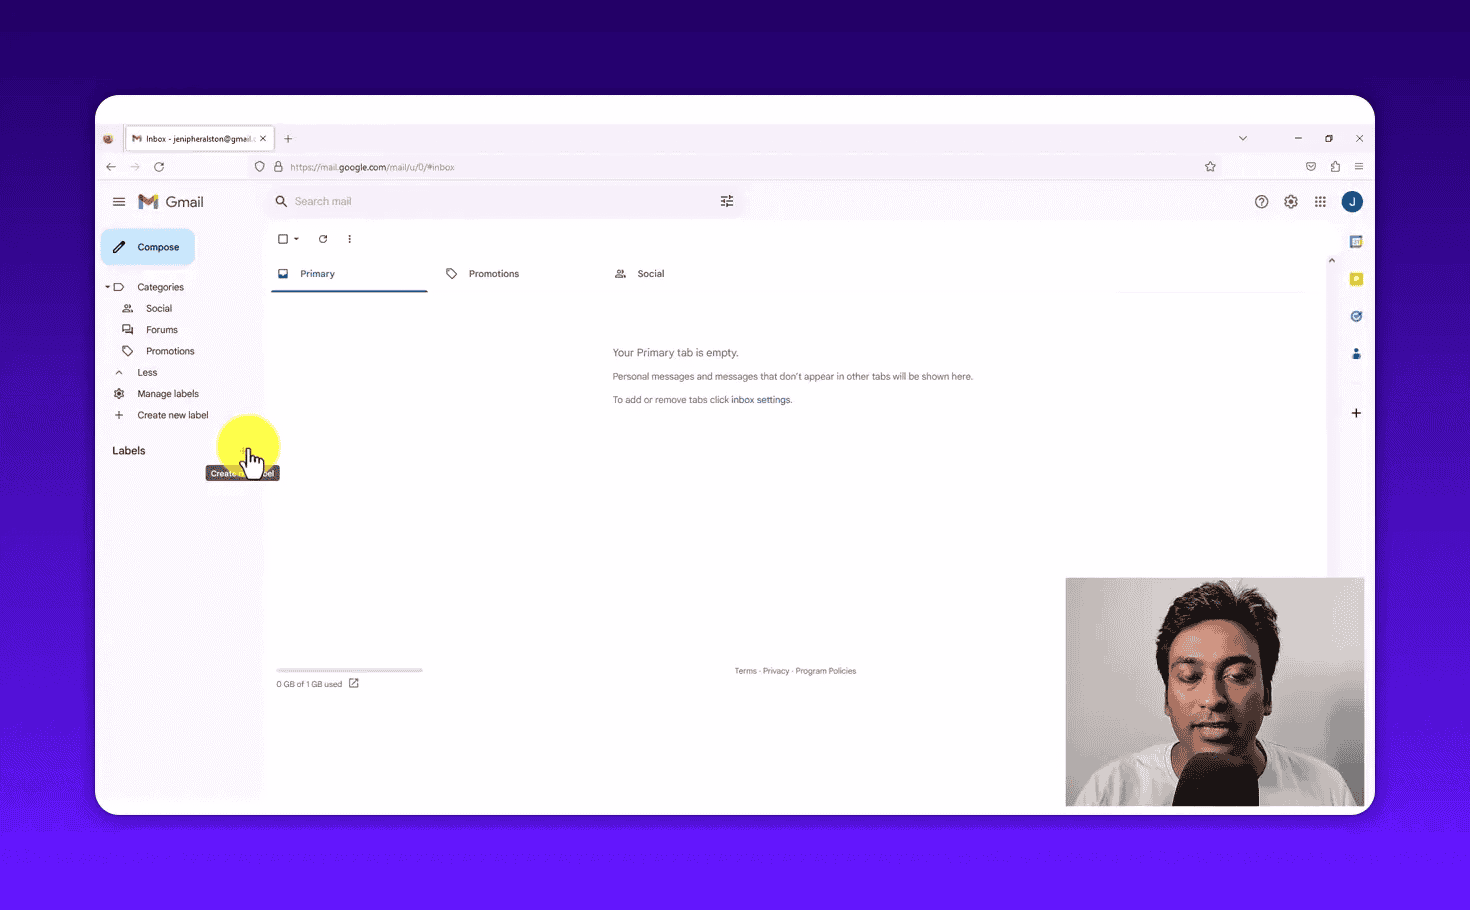
Once you accept the terms, Gmail opens your inbox. It will be empty, which is exactly right. Google may send one welcome message from the Gmail team.
The left sidebar shows the standard Gmail categories: Inbox, Starred, Snoozed, Sent, Drafts, and More. At the bottom of the sidebar, you’ll see a Labels section. This is where you can organize emails into custom folders.
For outreach accounts, I create labels immediately on setup. Something like Sent Campaigns, Responses, and Follow-Ups. When you send cold emails or SEO outreach messages and replies start coming in, having labels already set up makes the inbox manageable.
To create a label, scroll to the bottom of the left sidebar and click New label. Give it a name and click Create. Done.
The blue Compose button in the top left lets you write and send a new email from this account straight away.
How to Secure Your Gmail Account After Creation
Don’t skip this step. A few minutes on account security right after creation prevents serious problems later.
Click on your profile picture (top right corner) and select Manage your Google Account. Go to the Security tab.
This section shows you:
- Recent security activity: Every device and location that has accessed your account. Check this regularly. If you see a login from a country you’ve never visited, your account has been compromised.
- How you sign in: Whether you have a two-factor verification method set up. If not, set one up now.
- Two-Factor Authentication (2FA): Google calls this 2-Step Verification. Enable it. You’ll enter your password plus a second code from your phone each time you sign in. It makes your account far harder to break into.
- Password status: When you last changed your password and whether Google has detected it in any known data breaches.
- Recovery options: Your recovery email and phone number, with options to verify or change them.
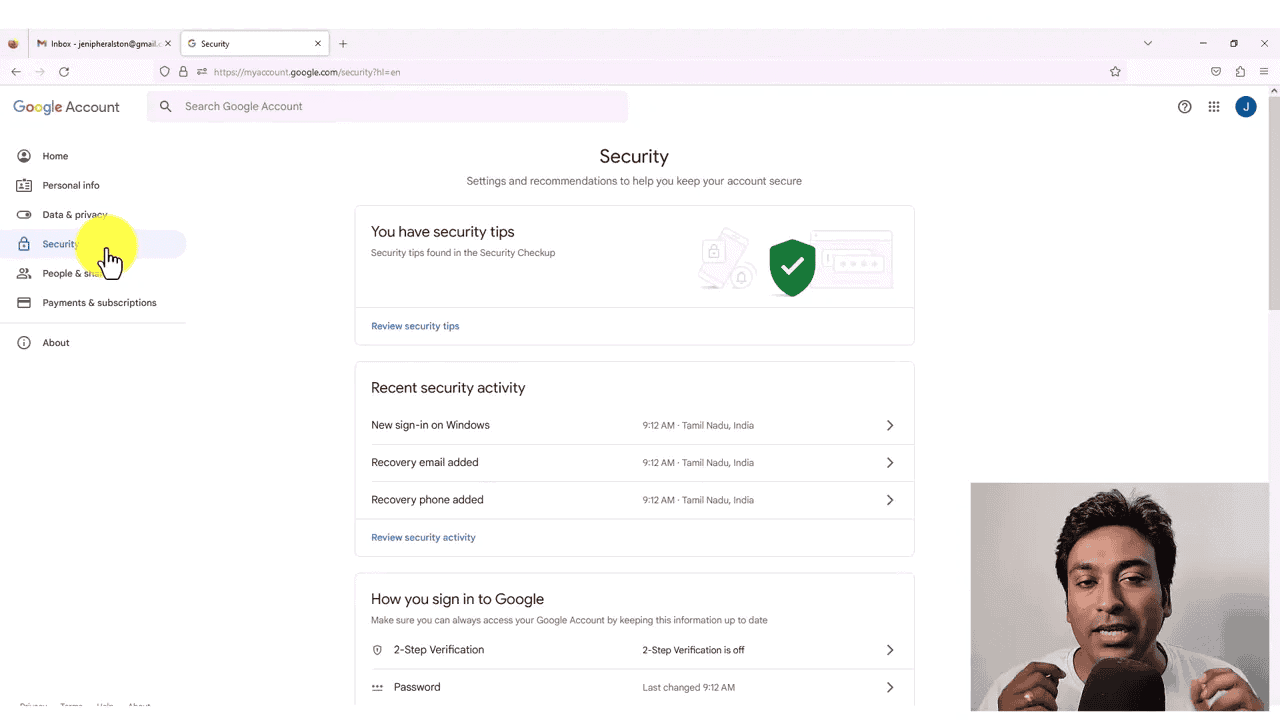
For accounts used in SEO outreach, pay attention to the security activity log. Outreach accounts are more visible than personal accounts. You’re putting the email address on websites, in emails to strangers, and potentially in your SEO tool logins. That exposure increases risk.
Set up 2FA immediately. It takes three minutes, and on an address you’re about to publish on other people’s websites it is the difference between losing an inbox and losing the Search Console access sitting behind it.
Setting Up the Gmail Account for SEO Outreach
If you created this account specifically for SEO link building or outreach campaigns, a few additional setup steps will help your deliverability and professionalism.
Set up a proper signature. Go to Settings (the gear icon in Gmail), click “See all settings,” go to the General tab, and scroll down to Signature. Add your name, title, and a link to your website. A proper signature increases reply rates for outreach.
Warm up the account before sending bulk emails. A brand-new Gmail address with no sending history that suddenly emits 200 cold emails is indistinguishable from a compromised account, and Gmail treats it accordingly. For the first two to four weeks, use it like an inbox: send and receive a few real emails a day, reply to things, let a reputation accumulate.
Don’t use this account for Gmail subscription signups or newsletters. Keep it clean and dedicated to outreach. Every spam newsletter that arrives damages your inbox reputation over time.
Respect the sending limits. A free Gmail account can send to roughly 500 recipients per day, and hitting that ceiling from a fresh account is the fastest way to get temporarily blocked. For outreach, stay far under it: 20 to 30 personalised emails a day from a warmed account outperforms a 300-email blast that lands in spam, and it keeps the account alive for the next campaign.
Don’t connect your SEO tool logins to your outreach address. Use a separate account to own Google Search Console, Analytics and paid tool subscriptions. If the outreach address ever gets suspended or handed to a client, your data access is untouched. When managing several accounts, check which one your browser is signed into before you click “connect” on anything, because that mistake is annoying to unwind.
Upgrade to a branded sender when the replies start mattering. A Gmail address is fine to start, but a domain-matched sender gets better reply rates and reads as a real business. You can set that up for free with Cloudflare Email Routing, forwarding [email protected] straight into this Gmail so you keep one inbox and gain the credibility.
Once the inbox is working, the actual outreach targets come from research: my 15+ free sources to find long-tail SEO keywords covers finding the topics worth pitching, and SEO fundamentals for business owners covers the groundwork those links are supposed to support.
Gmail Account for SEO: Common Questions
Can I create a Gmail account without a phone number?
Google asks for a number on nearly every new account now, and the old flows that skipped it are gone. Treat it as required. A prepaid SIM works, and one number will verify more than one account before Google stops accepting it. I don’t know the exact ceiling, and I wouldn’t build a process on top of it.
Can I change my Gmail address after creating it?
No. Your Gmail address is permanent. You can change your display name (the name other people see), but the actual email address before @gmail.com can’t be changed once set. If you want a different address, you need to create a new account.
How many Gmail accounts can I have?
Google publishes no limit. I run three and have never been asked about it. Each needs its own address and, in practice, a phone number. The real constraint isn’t Google’s policy. It’s how many inboxes you can actually read.
Is it safe to use Gmail for SEO outreach?
Yes, with proper setup. Use a dedicated account (not your personal Gmail), warm it up before bulk sending, set up a professional signature, and monitor the security tab regularly. Avoid sending more than 500 emails per day from a single Gmail account, as this can trigger spam filters.
What’s the difference between a Gmail account and a Google account?
A Gmail account is a Google account. Creating the address creates access to Drive, Docs, Search Console, Analytics and YouTube in the same motion. The address is only the identifier.
Which is the whole reason to keep the outreach one separate. You’re not creating an inbox. You’re creating the identity that owns your Search Console data, and outreach addresses are the ones that get burned.
Keep reading
You Might Also Like
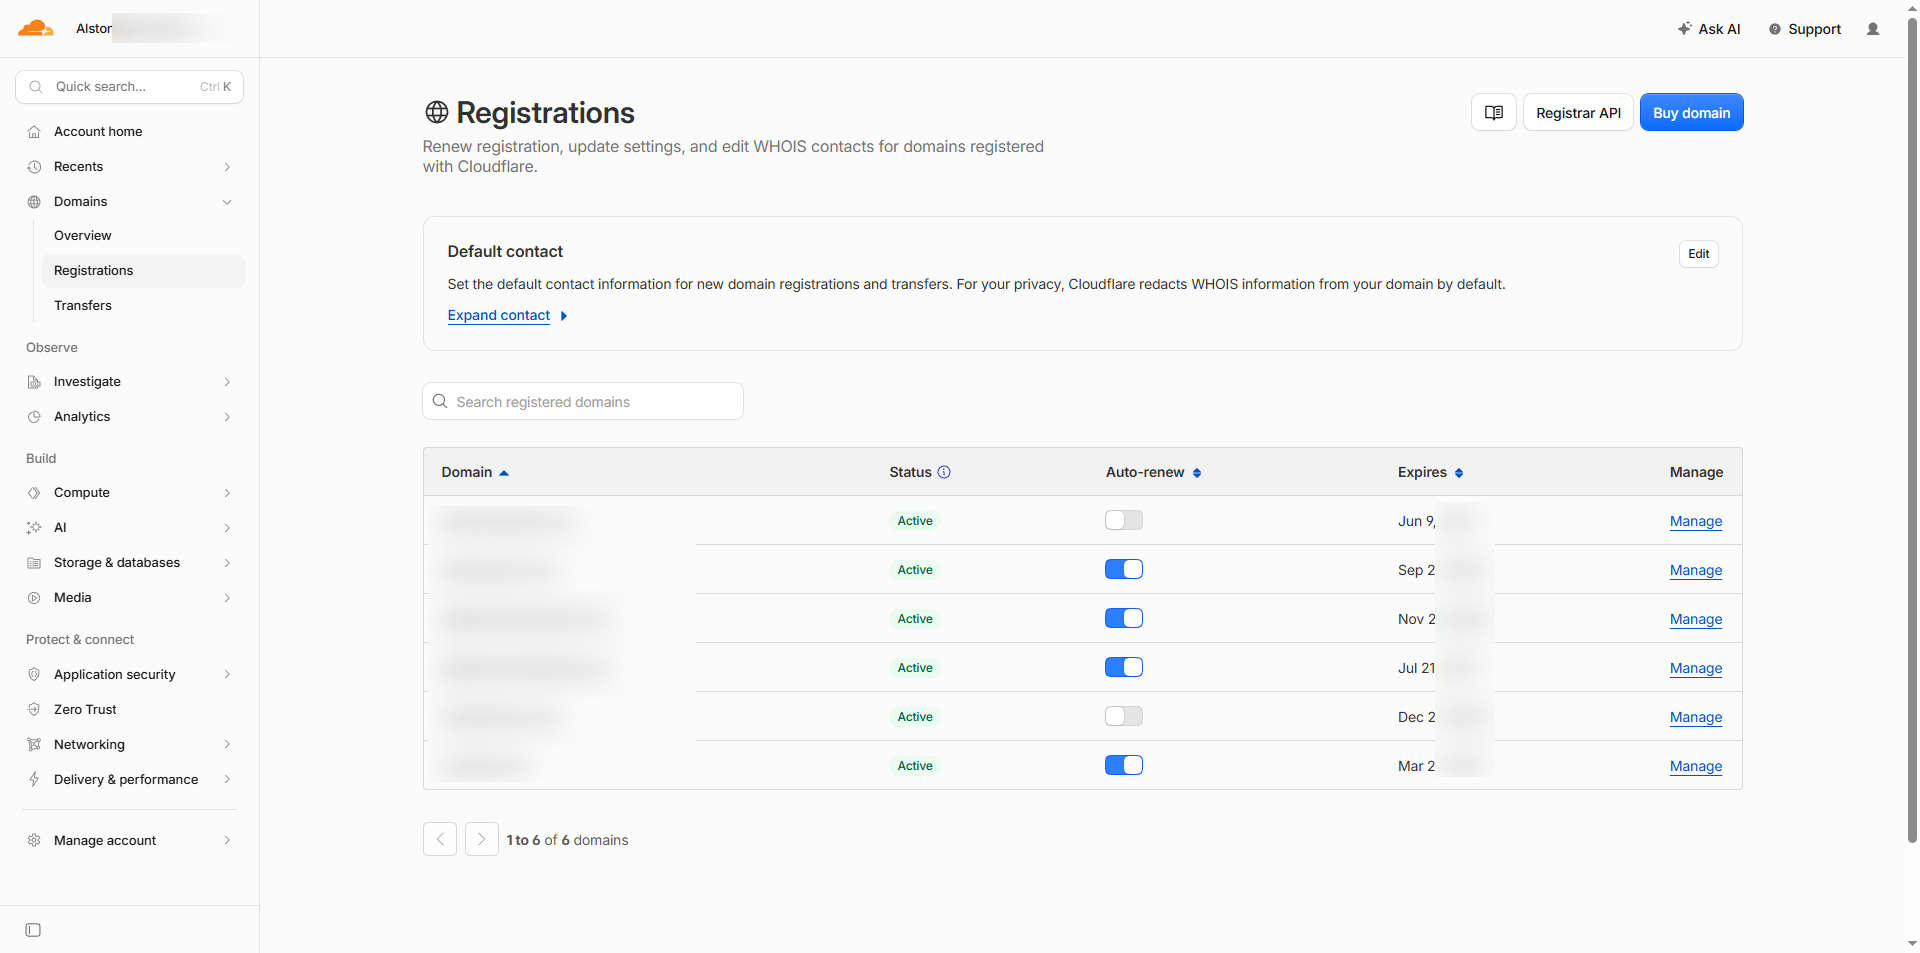
The Cheapest Domain Registrars for SEO
Your registrar has no effect on SEO. Compare renewal price, DNS control and transfer friction instead, and measure every quote against Cloudflare's.
4 min read
Blogger Not Indexing in Google? Here Is How to Fix It (2026)
Your Blogger site not indexing in Google for months? Learn how to fix redirect errors, m=1 issues, and Search Console problems step by step. Tested solutions inside.
14 min read

SaaS Keyword Research: The Complete Guide
The full SaaS keyword research process: market research, 15+ free sources, validation, scoring and clustering. Free Excel template and video course included.
39 min read